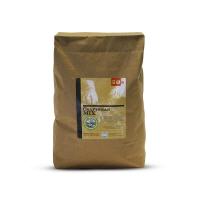
Craftsman Mix /22,7 kg
This is the enhanced version of Buddy's original concrete countertop mix. It is an artisan concrete blend designed to exhibit clay like properties in the wet state. The consistency of the mix lends itself for use with Buddy’s signature press technique, applying up vertical surfaces with minimal molding and simplicity of application. This mix is also ideal for troweling and can be plasticized to create a castable mix.
The mix uses all white ingredients, naturally curing to a bone white. It can be pigmented using any of the BR Color Series.
The mix has all of the necessary high-performance ingredients preblended, including curing polymer, such that only water and necessary reinforcement need to be added. The workability of the mix can be changed with the addition of our series of water reducers. Primary reinforcement can be achieved using our series of reinforcing fibers.
COVERAGE AND CEMENT CONTENT
This mix is typically cast at 3,17 cm - 3.81cm thick. It can be cast thinner, particularly with the use of AR Glass Fibers in the backer mix, but consideration must be given in the handling and support of the piece.
Coverage: +/- 0,5 m2 at 2,5 cm thick.
Total Cementitious Binder (per 22,7 kg) : 9.29 kg
|
|
Instructions
Preparation - Getting Ready to Mix
Have all ingredients assembled before you start. Wear vinyl or nitrile gloves and protective eye wear. Use an accurate scale for weighing components. Use materials between 10°C - 32°C. Colder temperatures will
slow the reaction and warmer temperatures will accelerate it.
The temperature of the Craftsman blended mix is also important and will affect the outcome. Once the temperature of the mix reaches 21°C, the reaction begins to accelerate. Using a laser thermometer to monitor, keep the temperature of the mix near 15° C. In warm environments, substitute up to 50% of the water with ice. Craftsman Mix has a shelf life of 1 year after purchase if kept in a dry, moisture free environment. Once opened, the material should be used as soon as possible.
Mixing Instructions
Use clean, potable water and clean mixing vessels. Use a handheld mortar mixer to mix. If mixing on a regular basis or for a large project, investing in a vertical shaft mixer may be justified.
• If adding pigment, combine water and pigment and mix thoroughly.
• Slowly add dry ingredients while mixing. Mix until fully blended.
• Add water reducer in small doses until the desired consistency is achieved.Once the amount of water reducer has been determined that dosage should be added to the mix water on subsequent batches for the day.
For Backer Mixes:
• Slowly add Alkali Resistant (AR) Glass Fiber* to the thoroughly mixed material. Blend until homogeneous. Temper with water reducer as needed for desired consistency.
*Mixing too long or at too high a speed after fiber has been added can filamentize or damage the fiber, resulting in placement issues and reduced strengths.
Casting Techniques
Press Technique - This technique is achieved by adding as little water as possible to create a dry, clay like mix, which is then hand packed into the mold. Because the mix is so dry, voids are created naturally during placement. This results in a veined look, unique to every piece. Typically, a thin surface layer is pressed into the form, followed by a backer mix containing AR Glass Fiber. This gives the piece the necessary structural reinforcement. When using the press technique, you will have voids that you may want to fill. Use Buddy Rhodes Bone Paste Plus to fill these voids with one color, or multiple colors. Allow to cure (typically overnight), then polish.
Trowel Technique - This technique is used to make pieces with the finished side facing up. Forms can be built to make precast elements, or cast in place countertops. Cast the material into the forms and use a wood or magnesium float to level the product with sweeping or circular motions. This initial processing stage can last several hours, be patient. Once the surface is firm, a steel trowel may be used to accent the top further. Caution: If a steel trowel is used too soon, air may be trapped beneath the surface, creating a weak, “egg-shell” layer that may flake off once cured.
Cast Technique - This technique (pour and vibrate) is fairly straight forward. Build a watertight mold and pour in the concrete.If mixed properly and vibrated well, a good clean surface can be achieved free of any air pockets or bug holes. For an aesthetic that includes pits and holes, minimize your water reducer and/or vibration.
Curing
In order to ensure that concrete reaches its maximum potential, keep the concrete warm and moist while curing. Ambient temperature should be kept at a minimum of 10°C. A layer of moist felt or fabric followed by plastic
sheeting will keep the moisture from escaping. This is often covered again by blankets or insulation to keep the heat from leaving the matrix. This is especially important on troweled finishes, since plastic placed directly on them is likely to leave discolorations. Demold after 24-48 hours, depending on shop conditions.
Polishing
Polishing can be done wet or dry. We recommend wet polishing as it will provide a finish true to the grit used and it reduces the risk to your health. To maintain the cream layer, lightly polish the concrete using pads that are 200 grit or higher. The higher grits produce higher sheen. To expose your sand (salt and pepper look) or any decorative aggregate, begin grinding with coarser grit pads, progressing to finer grits until reaching the desired sheen and aggregate exposure.
Sealing
Concrete is an inherently porous material and needs to be sealed for particular environments and uses. Choose the sealer that best fits the needs of the finishedpiece and the skill level of the person applying it. Buddy Rhodes offers a variety of sealer options, which can be found on our website.
